


")
Back on the subject of renovations!
After we revealed our new renovation project a little while ago, quite a few of you wrote and asked that we share our planning process for the renovation… That totally surprised me because let’s be honest, the planning stage isn’t the sexiest stage, and I had wondered whether you guys would want me to HURRY UP and share the house all made over. If you’re one of those people, you’ll be happy to know that it’s all coming together fairly quickly, with Ben and the team ploughing on to create something really cool. I’ll be sharing the plans and progress with you shortly, but in the meantime, for those of you who asked I present you… the ins and outs of planning a renovation! Let me first start by saying that obviously, every renovation is different, which is what makes it so fun (and challenging!). So what I’m sharing here is the process we used to plan our renovation, and I think they apply to most renovations!

How to Plan A Home Renovation
Step 1. Work Out A Budget
The first place to start when planning your renovation is… BUDGET! How much money you want to spend will determine what you are able to do – are you simply doing a general pretty up with a new coat of paint, or are you doing a full-blown remodel? When we started, the first thing we did was work out how much money we could afford to spend, factoring the cost of the property and how much we had/wanted to borrow. Because we are doing a full remodel, with a new level and a complete overhaul, straight away we knew that the budget would be tight, and we would be doing everything we could to create bespoke-inspired style on a budget. That’s the bit I’m most inspired to share with you!
Step 2. Gather Inspiration
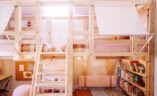
Now, the fun part! Time to put together some ideas for how you want your space to look and feel once it’s done. To do this, we spent time putting together ideas and pulling imagery that reflected both the structural elements we wanted to see as well as the decor. My main focus at first was the decor but it was really great to be guided by Ben through the structural things like space and orientation. I created some mood boards and have added to them throughout the process, adding DIYs, landscaping ideas and pretty much everything that inspires me.
Step 3. Create & Refine Your Scope
The next thing we did was to refine the ideas into actual elements that we wanted to see, designing the space and the elements that would be in it. This became a bit of a wish list for the house, which is essentially a scope of works. At this point, it’s a good idea to get an idea of the broad costs associated with your plans, and one way to do that is to get in touch with a builder or consult an online guide. For us, the original scope came in over budget (hello renovating!) so we tweaked some of the things we wanted and focused on our key priorities like light, space and yield. This stage will often be a process of going back and forth but it’s worth it to get it right.
Step 4. Design The Space
Once you’ve finalised your scope, it’s time for design! Depending on the project, you might need detailed drawings like layouts and cross-sections. You can develop drawings for using an architect, but that said, depending on the scale of your renovation you don’t always need drawings. The bigger and more complex the project the more you should consider drawings. A builder can often do a renovation for you without them just going by eye and communication – although in this case you often won’t get the perfect finish (but it might be worth it if your money is tight). Luckily for us, Ben and his team created drawings for the new design in literally no time, admittedly taking the headache/cost out of the process and meaning we could condense this stage into just a few days. They created plans (flat layouts) and elevations of the whole house and even sketch up (real life) models of the outside, bathrooms and kitchen/living/dining space in a very short amount of time. *You may have to submit your drawings to the council/authorities at this stage, something we didn’t have to do because the house had an existing approval on it – something that was both a blessing and a curse.
Step 5. Pick Your Team
Chances are you’ve already been in touch with a builder in the previous stages, and that person might be the perfect fit for you. If not, at this point it’s a good idea to work out who you will need, depending on the tasks that need doing, and whether you will manage them yourself or have a builder manage the whole team for you. If you can, contact a few with your plans and get a number of itemised quotes so you can compare. If you can see some examples of their work that will be handy too, so you can compare the finished product with the costs. My mum actually found the builder when she was walking one morning, she saw a heritage house being renovated with some really nice details on it and luckily his sign was out the front. Voila!
Step 6. Get A Final Cost Breakdown
Whether you’ve secured the builder already or are planning to compare quotes from a few, you’re going to need a detailed cost breakdown of what you’re planning to do. Because we were planning a full scale remodel this break down was huge and we needed to go through each item to review price, this time taking into account the broad cost of fittings and other details. Again, the budget was quite tight so at this point too we dropped a few things off our list, and tweaked the materials.
Step 7. Finally, Get Started!
Once we agreed on the scope and the cost, it’s time to get started! For us this means demolition and earth moving, in main to satisfy the existing council approvals. And whilst all that is happening, now for the fun stuff too… Choosing fittings, paint, kitchen tiles and a whole host of other details.

I hope that was useful for you guys! Renovations can be a bit scary because there are so many unknowns, but if you follow a bit of a process you’ll find that things come together. Stay tuned for more posts in this series!
Illustration by Natalie Ong. Inspiration Images from The Design Files, Sarah Sherman Samuel, Bo Bedre, BB Dakota, Rip & Tan, The Rhapsody.


