


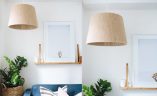
Helloo Friday! After travelling a lot in the past few weeks I’m excited to be back in the studio, but also pretty happy that I get to legitimately hang on the sofa and relax tomorrow. I’m sure you are too. In case you think you’ll get bored after a few hours of couch time, I wanted to share with you a very quick project that can be done in less than a few minutes, but will have you smugly admiring it for much much longer. The wood slice coffee table. If you’ve been following along on snapchat you’ll see how much I love to throw it in! I had been wanting a coffee table to put in the lounge room of our apartment (the before & after is going well!), but needed to find something small – more like a side table. I played around with the idea of marble and metal but always came back to the concept of wood. After looking around for a wood slice and coming up empty handed, I happened to stumble upon these large Chinese chopping boards – and knew they would be perfect. If you can’t find them locally, try Amazon or (if possible) your local China Town. Enjoy and have a great weekend!

DIY Wood Slice Table
You need
- Wood slice or thick chopping board
- Hairpin legs (try here)
- Screws
- Screw driver

How to
- Place the hairpin legs on the bottom of the wood slice, adjusting so that they are spaced equally apart. Also make sure that none of the metal corners stick out over the wood.

2. Secure the hairpin legs down using screws and a screw driver, and you’re done!

I told you it was quick 🙂

After sharing the tutorial over on snapchat while I was making it, I put it out there about whether we should paint the top of it white – I wondered if that would be more fresh. Virtually everyone said no (via snapchat screenshots hahaha) so we decided to leave it. Very happy with it and glad we didn’t go for the paint. 🙂 Ps follow along for more DIY over on snap: @apair_andaspare.
Photos by Bryant Lee


