


Put a wreath on it. Or something like that!
Full disclosure guys, I ummed and ahhed a bit about whether to post this tutorial. I created these the day before Christmas (after I had already logged off the blog for a few days), and sort of felt as though I had missed the boat on posting it for the festive season. However, Instagram’s trusty poll feature indicated that 87% of you thought I should go ahead and post it… So when the internet asks, you deliver! I rationalised that while these were perfect for Christmas Eve, you can also use them in Mid Summer, as baby shower or bachelorette party decorations, or even as leaf headbands. So yeah, pretty versatile! I used two methods to make these DIY leaf wreaths, so I thought I would share those with you here. Enjoy!

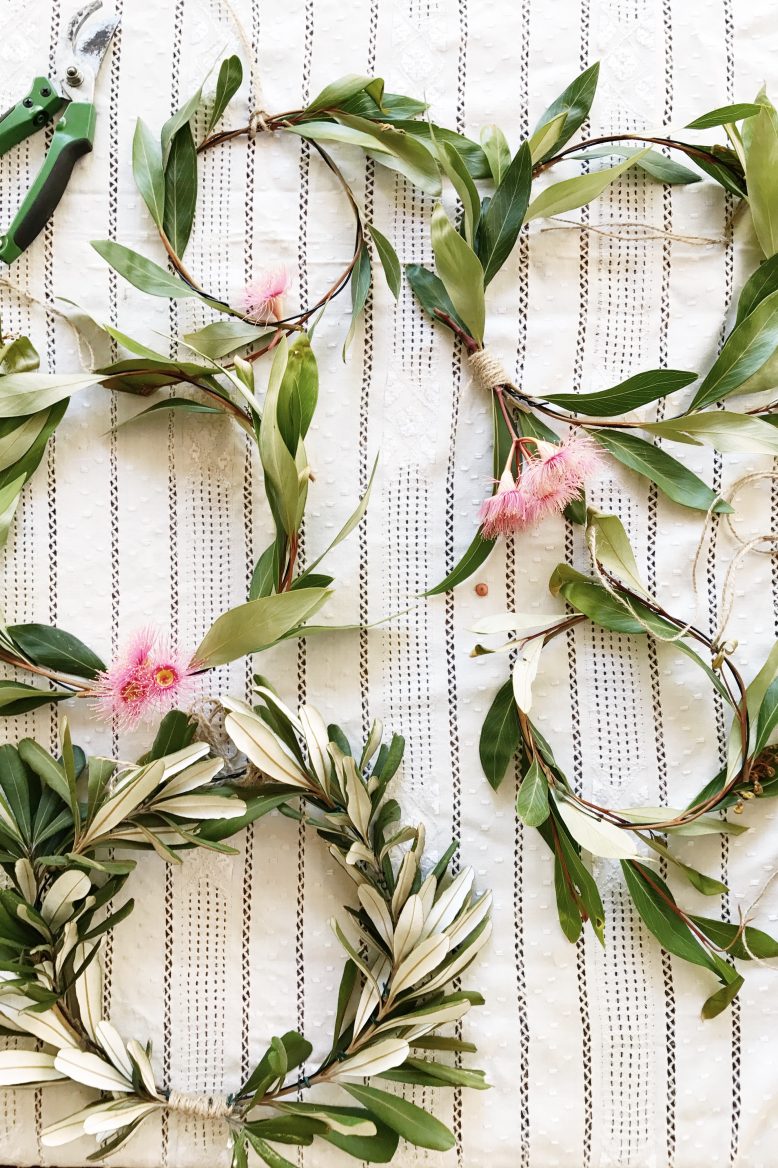
DIY Leaf Wreaths
The materials for these projects I got from Bunnings in the garden supplies section – and were purchased super affordably which makes them a great decor option! For both of these projects I simply foraged for leaves in the garden, and grabbed some on my street (sorry neighbours!). They were all Australian natives but you can pretty much use any sort of plants. However, the two wreaths require different types of leaves – the first requires ones with clusters of leaves on sprigs, and the other requires flexible branches with leaves coming off them. Take note of that when looking!
The Clustered Leaf Wreath
You need
- Thick Wire
- Twine
- Garden ties or florists wire
- Sprigs of leaves
How to
- First, make a circle using the thick wire. You can make it any size you like.
- Taking a sprig of leaves, use a small piece of florist’s wire to secure it onto the base.
- Keep adding more sprigs on one side, always pointing the leaves in the same direction.
- Once you get to the top/middle, start again on the other side, pointing the leaves in the other direction.
- Tie more sprigs on all the way up to the top of the other side.
- To finish the wreath, wrap any visible florists wire in twine, such as in the middle at the base.
- Finally, add another piece of twine for hanging the wreath.


The Simple Leaf Wreath
You need
- Thick Wire
- Twine
- Leaves on long stems or flexible branches
How to
- First, make a circle using the thick wire. Once again you can make it any size you like but we went with small for these.
- Cut a length of branch with leaves attached.
- Line the end of the branch up with the wire, and start thread the branch around the wire.
- Once you have threaded one branch one, add another. If you find they are coming off, add some florists wire to secure.
- When you’re finished, add some flowers and twine for hanging.


I hung the wreaths on the wall using easy 3M wall hooks, and added some string lights from Bunnings to the little corner which made the whole spot pop!


Pin this easy DIY project on Pinterest!


